初識Spring Framework
來源:程序員人生 發布時間:2015-03-13 08:37:56 閱讀次數:3405次
最近在工作用到了Spring框架,由于之前沒有接觸過Spring,就從Spring的官方文檔開始學起。在“Quick Start”介紹了1個使用Spring做依賴性注入(dependency injection)的例子,該例子使用Maven或GRADlE進行管理的。作者之前沒有接觸過這兩個項目管理工具,由于時間緊急,就直接使用了Eclipse編譯了這個例子。在Eclipse下的文件結構以下:
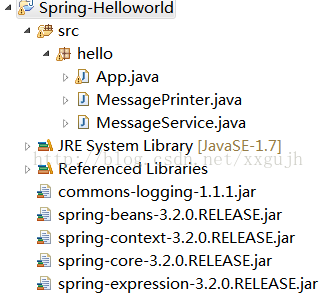

(由于沒有使用項目管理工具,剛開始只加入了spring-context.jar和spring-core.jar,又根據異常信息導入了commouns-logging.jar、spring-expression.jar和spring-beans.jar。這就是否是項目管理工具的麻煩所在。)
hello/MessageService.java的代碼以下:
package hello;
public interface MessageService {
String getMessage();
}
hello/MessagePrinter.java的代碼以下:
package hello;
import org.springframework.beans.factory.annotation.Autowired;
import org.springframework.stereotype.Component;
@Component
public class MessagePrinter {
final private MessageService service;
@Autowired
public MessagePrinter(MessageService service) {
this.service = service;
}
public void printMessage() {
System.out.println(this.service.getMessage());
}
}
hello/App.java的代碼以下:
package hello;
import org.springframework.context.ApplicationContext;
import org.springframework.context.annotation.*;
@Configuration
@ComponentScan
public class App {
@Bean
MessageService mockMessageService() {
return new MessageService() {
public String getMessage() {
return "Hello World!";
}
};
}
public static void main(String[] args) {
ApplicationContext context =
new AnnotationConfigApplicationContext(App.class);
MessagePrinter printer = context.getBean(MessagePrinter.class);
printer.printMessage();
}
}
編譯運行該項目,會有以下輸出:

“Quick Start”最后總結說這個充分體現了依賴性注入(dependency injection)的概念,至于如何體現的作者嘗試做1下解析,權當對Spring Framework的1個初步認識。
項目的入口是App.java的main函數,在這個函數中首先聲明了1個ApplicationContext對象context,并向下轉型為AnnotationConfigApplicationContext對象。ApplicationContext是對1個利用(Application)提供配置的核心接口,AnnotationConfigApplicationContext是它的1個實現,可用來處理用@Configuration,@Component和JSR⑶30標注的類。由于App.java使用@Configuration進行了標注,故App.class可以作為AnnotationConfigApplicationContext構造器的的參數。
MessagePrinter printer = context.getBean(MessagePrinter.class);
這句代碼通過context的getBean(Class<T>)方法得到了MessagePrinter的1個實例。為何呢得到MessagePrinter類的1個實例呢?看getBean(Class<T>)的API解釋:
Return the bean instance that uniquely matches the given object type, if any.
(如果給定的對象唯1匹配,就返回1個bean實例。)
printer.printMessage();
調用MessagePrinter的printMessage()方法,該方法以下實現:
public void printMessage() {
System.out.println(this.service.getMessage());
}
實際上是調用了接口MessageService的getMessage()方法,由于App.java中的mockMessageService()方法中的匿名內部類實現了MessageService接口,并在getMessage()方法中返回了“hello,world!”字符串,顧能在結果中輸出"hello,world!"。
使人迷惑的是在mockMessageService()方法并沒有被顯式調用,為什么其匿名內部類能被實例化并輸出信息呢?緣由就在于程序中使用的以下Spring標注。
@Configuration 用于標注1個類,表示bean定義的源文件(source);
@Bean 用于標注1個方法,表示1個方法實例化、配置或初始化1個新的對象(Object),這個對象被Spring的控制反轉(IoC)容器管理,相當于Spring <bean />XML配置文件中<bean />元素。(詳見官方文檔)
@ComponentScan 用于標注1個類,表示掃描指定包中的@Component標注的類,并將這些類注冊為Spring IoC容器的bean,亦相當于1個<bean />元素;
@Autowired 用于標注setter方法,構造器,包括多個參數的方法,集合等等,用于自動綁定;
@Component 用于標注1個類
由于MessagePrinter中有以下構造器:
@Autowired
public MessagePrinter(MessageService service) {
this.service = service;
}
從這個構造器中可以到MessagePrinter依賴MessgeServie,并用@Autowired標注。這就表示在通過contexnt.getBean(MessagePrinter.class)得到MessagePrinter的1個實例時,會將對MessageService的依賴自動綁定到MessageService類,將查找所有能作為<bean />元素的類(@Component @Configuration標注)或方法(@Bean標注),而在App.java中有以下方法:
@Bean
MessageService mockMessageService() {
return new MessageService() {
public String getMessage() {
return "Hello World!";
}
};
}
查找到這個方法后會將這個MessageService實現注入到MessagePrinter實例中,從而實現“hello,world!”的輸出。
以上就是作者對Spring Framework文檔“Quick Start”例子的解析,有不當的地方=請多多指教。
生活不易,碼農辛苦
如果您覺得本網站對您的學習有所幫助,可以手機掃描二維碼進行捐贈


