
原文地址:http://android.xsoftlab.net/training/multiscreen/index.html
Android運行于數以百計不同尺寸的裝備上。范圍小得手持移動電話,大到電視裝備。因此,在設計APP時應當統籌到盡量多的屏幕尺寸。這樣才能照顧到較多的潛伏用戶。
但是僅僅斟酌不同的裝備類型還不夠。每種尺寸為用戶提供了不同的可能性與挑戰,所以為了使用戶感到滿意,利用程序需要做的不單單是支持多樣的屏幕:它還必須對每種屏幕結構將用戶體驗優化到最好。
這節課將會學習如何實現針對屏幕結構優化的用戶界面。
Note: 這節課與相干示例程序均使用的是support library。
這節課將會學習通過以下方式來支持不同的屏幕尺寸:
為了使布局可以靈活的適配不同的屏幕尺寸,應當對某些View組件的width,height屬性使用”wrap_content”或”match_parent”。如果使用了”wrap_content”,那末View的高寬會被設置為View內容所需的最小尺寸。但是”match_parent”會使View的高寬擴大到父布局的尺寸大小。
通過使用”wrap_content”或”match_parent”可使View高寬擴大到View所需要的大小或擴大到父布局的可用空間:
<LinearLayout xmlns:android="http://schemas.android.com/apk/res/android"
android:orientation="vertical"
android:layout_width="match_parent"
android:layout_height="match_parent">
<LinearLayout android:layout_width="match_parent"
android:id="@+id/linearLayout1"
android:gravity="center"
android:layout_height="50dp">
<ImageView android:id="@+id/imageView1"
android:layout_height="wrap_content"
android:layout_width="wrap_content"
android:src="@drawable/logo"
android:paddingRight="30dp"
android:layout_gravity="left"
android:layout_weight="0" />
<View android:layout_height="wrap_content"
android:id="@+id/view1"
android:layout_width="wrap_content"
android:layout_weight="1" />
<Button android:id="@+id/categorybutton"
android:background="@drawable/button_bg"
android:layout_height="match_parent"
android:layout_weight="0"
android:layout_width="120dp"
style="@style/CategoryButtonStyle"/>
</LinearLayout>
<fragment android:id="@+id/headlines"
android:layout_height="fill_parent"
android:name="com.example.android.newsreader.HeadlinesFragment"
android:layout_width="match_parent" />
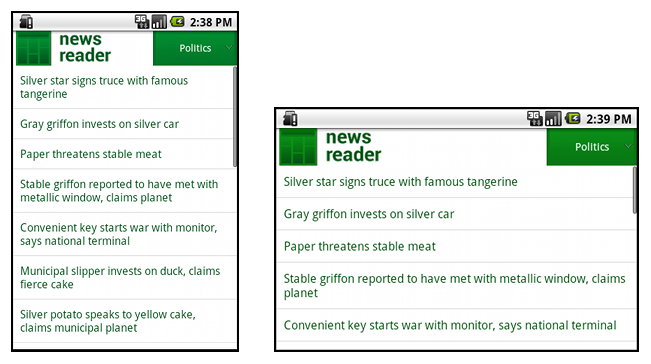
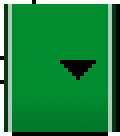
</LinearLayout>注意示例中是如何使用”wrap_content”及”match_parent”的。這可使布局正確的適配不同的屏幕尺寸及方向。
下圖是布局在垂直及水平方向的示例。注意View的尺寸會自動適配屏幕的高寬:
你可使用LinearLayout結合”wrap_content”或”match_parent”構造相對復雜的布局。但是,LinearLayout不能夠精確的控制子View的相對關系。在LinearLayout中View只能簡單的被線性排列。如果需要調劑View間的相對關系,1種較好的解決方式就是使用RelativeLayout,它允許指定View間的相對關系。下面的示例中,你可以指定1個View靠著另外一個View的左側,而另外一個View的右側則靠著屏幕的右側。
<?xml version="1.0" encoding="utf⑻"?>
<RelativeLayout xmlns:android="http://schemas.android.com/apk/res/android"
android:layout_width="match_parent"
android:layout_height="match_parent">
<TextView
android:id="@+id/label"
android:layout_width="match_parent"
android:layout_height="wrap_content"
android:text="Type here:"/>
<EditText
android:id="@+id/entry"
android:layout_width="match_parent"
android:layout_height="wrap_content"
android:layout_below="@id/label"/>
<Button
android:id="@+id/ok"
android:layout_width="wrap_content"
android:layout_height="wrap_content"
android:layout_below="@id/entry"
android:layout_alignParentRight="true"
android:layout_marginLeft="10dp"
android:text="OK" />
<Button
android:layout_width="wrap_content"
android:layout_height="wrap_content"
android:layout_toLeftOf="@id/ok"
android:layout_alignTop="@id/ok"
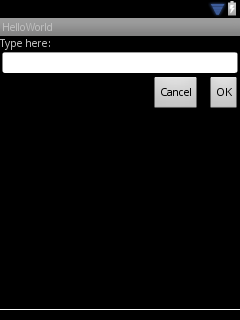
android:text="Cancel" />
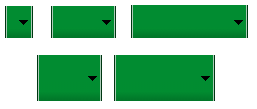
</RelativeLayout>下圖是該布局在QVGA屏幕中的顯示效果:
下圖是該布局在大屏幕中的顯示效果:
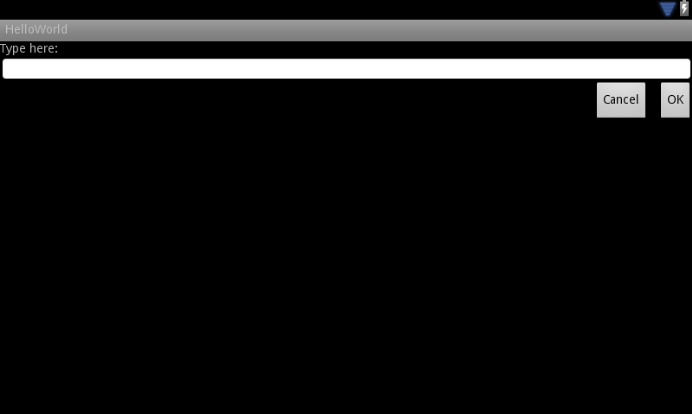
要注意雖然這些View的尺寸產生了改變,但是其它之間的相對關系還是保存了下來。
上面我們學習了如何利用靈活布局或相對布局來匹配不同的屏幕,但是這對匹配任何屏幕來講還不夠好。因此,利用程序不單單只是實現靈活的布局,還應當對不同的屏幕配置提供相應的布局。可以通過configuration qualifiers中所描寫的內容學習具體細節,它可使程序在運行時根據當前的屏幕配置來自動選擇對應的資源。
比如說,很多利用程序針對大屏幕實現了”two pane”的模式。平板與電視大到足以同時顯示兩個面板,但是移動電話只能同時顯示其中1個。所以,要實現這類布局,項目中應當含有以下文件:
<LinearLayout xmlns:android="http://schemas.android.com/apk/res/android"
    android:orientation="vertical"
    android:layout_width="match_parent"
    android:layout_height="match_parent">
    <fragment android:id="@+id/headlines"
              android:layout_height="fill_parent"
              android:name="com.example.android.newsreader.HeadlinesFragment"
              android:layout_width="match_parent" />
</LinearLayout><LinearLayout xmlns:android="http://schemas.android.com/apk/res/android"
android:layout_width="fill_parent"
android:layout_height="fill_parent"
android:orientation="horizontal">
<fragment android:id="@+id/headlines"
android:layout_height="fill_parent"
android:name="com.example.android.newsreader.HeadlinesFragment"
android:layout_width="400dp"
android:layout_marginRight="10dp"/>
<fragment android:id="@+id/article"
android:layout_height="fill_parent"
android:name="com.example.android.newsreader.ArticleFragment"
android:layout_width="fill_parent" />
</LinearLayout>要注意第2個布局的目錄路徑的large標識符。這個布局會在屏幕類型為large時被采取(比如,7英寸的平板或更大的裝備)。其它布局則會被小型裝備所采取。
開發者會遇到的困難之1就是在3.2之前Android的裝備只有”large”屏幕尺寸,這包括了Dell Streak、Galaxy Tab和常規的7英寸平板。但是,很多利用程序希望可以在這個范圍下不同尺寸的裝備中展現不同的布局,比如5英寸的裝備或7英寸的裝備,乃至是所有的”large”裝備都想斟酌在內。這就是為何Android會3.2的版本中引入”最小寬度(Smallest-width)”標識符的緣由。
最小寬度限定符允許將最小寬度為給定的dp寬度的裝備作為目標。比如說,經典的7英寸平板的最小寬度為600dp,如果希望可以在這塊屏幕上同時放置兩個面板的話,可以直接使用上臉部分中所介紹的雙面板布局。不過這里則不是large尺寸標識符,而是使用sw600dp尺寸標識符,用于指明該布局運行于最小寬度為600dp的裝備上。
<LinearLayout xmlns:android="http://schemas.android.com/apk/res/android"
android:orientation="vertical"
android:layout_width="match_parent"
android:layout_height="match_parent">
<fragment android:id="@+id/headlines"
android:layout_height="fill_parent"
android:name="com.example.android.newsreader.HeadlinesFragment"
android:layout_width="match_parent" />
</LinearLayout><LinearLayout xmlns:android="http://schemas.android.com/apk/res/android"
android:layout_width="fill_parent"
android:layout_height="fill_parent"
android:orientation="horizontal">
<fragment android:id="@+id/headlines"
android:layout_height="fill_parent"
android:name="com.example.android.newsreader.HeadlinesFragment"
android:layout_width="400dp"
android:layout_marginRight="10dp"/>
<fragment android:id="@+id/article"
android:layout_height="fill_parent"
android:name="com.example.android.newsreader.ArticleFragment"
android:layout_width="fill_parent" />
</LinearLayout>這意味著只有裝備的最小寬度大于或等于600dp時才會選擇layout-sw600dp/main.xml,再略微小點的布局則會選擇layout/main.xml。
但是,以上部份在3.2之前其實不會有甚么效果,由于3.2之前的系統辨認不出sw600dp這類尺寸標識符,所以最好還是保存large標識符,所以會有1個名為res/layout-large/main.xml的布局文件,其中的內容與res/layout-sw600dp/main.xml保持1致。下面的部份將會介紹1種技術來避免重復的布局文件。
最小寬度限定符只在Android 3.2上開始可用。因此,開發者還應當繼續使用抽象尺寸標志(small, normal, large及xlarge)來兼容較早的版本。所以,如果希望在移動電話中顯示單面板UI,在其它較大的屏幕中采取多面板UI,那末項目中應當含有以下文件:
這后面兩個文件是完全相同的,由于其中1個是用來匹配Android 3.2的裝備的,而另外一個是用來匹配較早版本的裝備的。
為了不存在這類重復的文件,可使用別名文件技術。比如,你可以定義以下布局文件:
然后添加兩個文件:
<resources>
<item name="main" type="layout">@layout/main_twopanes</item>
</resources><resources>
<item name="main" type="layout">@layout/main_twopanes</item>
</resources>后面這兩個文件含有相同的內容,但是它們實際上并沒有定義布局。它們只是將main_twopanes的別名設置為了main而已。1旦這些文件包括了large 或sw600dp,那末所有的系統則不會再專門辨別版本。
有些布局在垂直及水平方向上均表現良好。但在新聞瀏覽示例APP中,針對每種屏幕尺寸與方向均專門定義了布局:
上面所有的布局文件都被放置在res/layout/目錄下。為了使每種布局與相干的屏幕配置產生關聯,App使用布局別名的方式來匹配每項配置:
res/layout/onepane.xml:
<LinearLayout xmlns:android="http://schemas.android.com/apk/res/android"
android:orientation="vertical"
android:layout_width="match_parent"
android:layout_height="match_parent">
<fragment android:id="@+id/headlines"
android:layout_height="fill_parent"
android:name="com.example.android.newsreader.HeadlinesFragment"
android:layout_width="match_parent" />
</LinearLayout>res/layout/onepane_with_bar.xml:
<LinearLayout xmlns:android="http://schemas.android.com/apk/res/android"
android:orientation="vertical"
android:layout_width="match_parent"
android:layout_height="match_parent">
<LinearLayout android:layout_width="match_parent"
android:id="@+id/linearLayout1"
android:gravity="center"
android:layout_height="50dp">
<ImageView android:id="@+id/imageView1"
android:layout_height="wrap_content"
android:layout_width="wrap_content"
android:src="@drawable/logo"
android:paddingRight="30dp"
android:layout_gravity="left"
android:layout_weight="0" />
<View android:layout_height="wrap_content"
android:id="@+id/view1"
android:layout_width="wrap_content"
android:layout_weight="1" />
<Button android:id="@+id/categorybutton"
android:background="@drawable/button_bg"
android:layout_height="match_parent"
android:layout_weight="0"
android:layout_width="120dp"
style="@style/CategoryButtonStyle"/>
</LinearLayout>
<fragment android:id="@+id/headlines"
android:layout_height="fill_parent"
android:name="com.example.android.newsreader.HeadlinesFragment"
android:layout_width="match_parent" />
</LinearLayout>res/layout/twopanes.xml:
<LinearLayout xmlns:android="http://schemas.android.com/apk/res/android"
    android:layout_width="fill_parent"
    android:layout_height="fill_parent"
    android:orientation="horizontal">
    <fragment android:id="@+id/headlines"
              android:layout_height="fill_parent"
              android:name="com.example.android.newsreader.HeadlinesFragment"
              android:layout_width="400dp"
              android:layout_marginRight="10dp"/>
    <fragment android:id="@+id/article"
              android:layout_height="fill_parent"
              android:name="com.example.android.newsreader.ArticleFragment"
              android:layout_width="fill_parent" />
</LinearLayout>res/layout/twopanes_narrow.xml:
<LinearLayout xmlns:android="http://schemas.android.com/apk/res/android"
    android:layout_width="fill_parent"
    android:layout_height="fill_parent"
    android:orientation="horizontal">
    <fragment android:id="@+id/headlines"
              android:layout_height="fill_parent"
              android:name="com.example.android.newsreader.HeadlinesFragment"
              android:layout_width="200dp"
              android:layout_marginRight="10dp"/>
    <fragment android:id="@+id/article"
              android:layout_height="fill_parent"
              android:name="com.example.android.newsreader.ArticleFragment"
              android:layout_width="fill_parent" />
</LinearLayout>
以上對所有可能的布局均作了定義,它們會與相干的屏幕配置產生映照關系:
res/values/layouts.xml:
<resources>
    <item name="main_layout" type="layout">@layout/onepane_with_bar</item>
    <bool name="has_two_panes">false</bool>
</resources>
res/values-sw600dp-land/layouts.xml:
<resources>
    <item name="main_layout" type="layout">@layout/twopanes</item>
    <bool name="has_two_panes">true</bool>
</resources>
res/values-sw600dp-port/layouts.xml:
<resources>
    <item name="main_layout" type="layout">@layout/onepane</item>
    <bool name="has_two_panes">false</bool>
</resources>
res/values-large-land/layouts.xml:
<resources>
    <item name="main_layout" type="layout">@layout/twopanes</item>
    <bool name="has_two_panes">true</bool>
</resources>
res/values-large-port/layouts.xml:
<resources>
    <item name="main_layout" type="layout">@layout/twopanes_narrow</item>
    <bool name="has_two_panes">true</bool>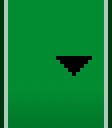
</resources>支持不同的屏幕尺寸一樣意味著圖片資源一樣也需要自動適配不同的尺寸。比如,1張按鈕的背景圖必須匹配按鈕的形狀。
如果要將1張簡圖片利用在組件中,必須敏銳的意想到結果可能不是想象中那樣,由于在運行時將會拉伸或緊縮圖片。解決辦法就是使用9宮格位圖,它是1種特殊的PNG格式的文件,它內部指明了哪部份區域可以被拉伸,哪部份不可以。
因此,在設計位圖時應當首先選用9宮格。為了將位圖轉化為9宮格位圖,你可以從1張有規律的圖片開始(下圖被放大了4倍)。
然后通過draw9patch工具將該圖片打開,該工具位于tools/目錄下,它可以用來標記哪塊區域可以被拉伸。拉伸標記位于圖片的左側和頂部。你也能夠通過在右側及底部繪點的方式來定義內容區域,以下圖所示:
注意邊上那些黑色的像素點。左側和頂部的點指明了圖象可以被拉伸的區域,右側和頂部的點指明了內容區域。
最后還要注意.9.png的擴大名。必須使用該擴大名,由于這是框架將其與普通圖片辨別的1種方式。
當在使用這張圖片作為背景時,框架會將圖片拉伸以適應按鈕的尺寸,以下圖所示:

程序員人生,我編程,我富裕,記住wfuyu網,php教程,php學習,php手冊,CMS模版制作
聲明:本站大部分內容是作者原創,少部分收集于互聯網供大家一起學習,原版權很多不明,如有侵權請聯系本站,謝謝!
粵ICP備14040726號-1?? 2015-2020 程序員人生 版權所有


