
android動畫分為3種:AnimationDrawable(類)逐幀動畫;Tween補間動畫;property animation屬性動畫;
第1種的類名:AnimationDrawable,在資料文件部份,這類動畫也屬于Drawable的1種,是Drawable的子類;
第2種的類名:Animation,Animation是個抽象類,android提供了幾個具體的實現類如TranslateAnimation,RotateAnimation,AlphaAnimation,ScaleAnimation;
第3種的類名:Animator,Animator也是個抽象類,android提供了ValueAnimator和ObjectAnimator和Animatorset作為具體實現。其中ObjectAnimator繼承了ValueAnimator,前者1般情況下使用起來可以更方便,但有些特殊情況必須使用ValueAnimator. 而Animatorset可以對多個Animator對象包裹。
在這里主要就Animator進行1些記錄:
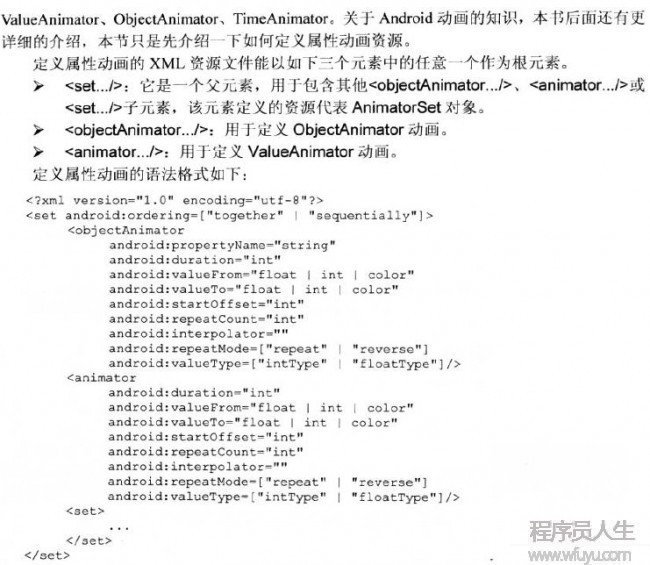
定義屬性動畫資源文件的格式舉例:

實例-實現不斷漸變的背風景
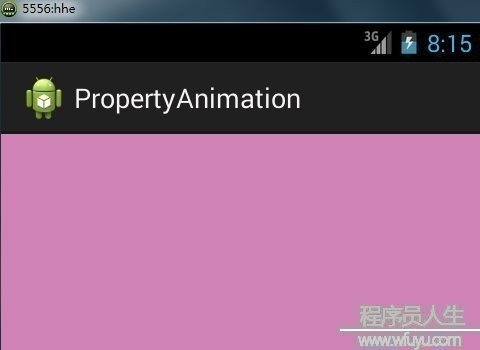
res文件夾下建立animator文件夾,在該文件夾下建立
color_anim.xml
<?xml version="1.0" encoding="utf⑻"?>
<objectAnimator xmlns:Android="http://schemas.android.com/apk/res/android"
android:propertyName="backgroundColor"
android:duration="3000"
android:valueFrom="#FF8080"
android:valueTo="#8080FF"
android:repeatCount="infinite"
android:repeatMode="reverse"
android:valueType="intType">
</objectAnimator>
其他文件
activity_main.xml
<LinearLayout xmlns:android="http://schemas.android.com/apk/res/android"
xmlns:tools="http://schemas.android.com/tools"
android:id="@+id/my_linear"
android:layout_width="match_parent"
android:layout_height="match_parent"
tools:context=".MainActivity"
android:orientation="vertical">
</LinearLayout>
MainActivity.Java
package com.example.propertyanimation;
import android.os.Bundle;
import android.animation.AnimatorInflater;
import android.animation.ArgbEvaluator;
import android.animation.ObjectAnimator;
import android.annotation.SuppressLint;
import android.app.Activity;
import android.content.Context;
import android.view.Menu;
import android.view.View;
import android.widget.LinearLayout;
public class MainActivity extends Activity {
@Override
protected void onCreate(Bundle savedInstanceState) {
super.onCreate(savedInstanceState);
setContentView(R.layout.activity_main);
LinearLayout
Container=(LinearLayout) super.findViewById(R.id.my_linear);
container.addView(new MyAnimationView(this));
}
public class MyAnimationView extends View{
@SuppressLint("NewApi")
public MyAnimationView(Context context) {
super(context);
//加載動畫資源
ObjectAnimator colorAnim=(ObjectAnimator) AnimatorInflater.loadAnimator(MainActivity.this, R.animator.color_anim);
/**
* 如果想要的動畫類型是Android系統所未知的,那末通過實現TypeEvaluator接口就可以夠創建自己的評價器。
* Android系統已知的類型是int、float或色彩(color),分別有IntEvaluator、FloatEvaluator
* 和ArgbEvaluator類型的評價器所支持。
*/
colorAnim.setEvaluator(new ArgbEvaluator());
//對該View本身利用屬性動畫
colorAnim.setTarget(this);
//開始指定動畫
colorAnim.start();
}
}
}
屬性動畫使用時有時會用到自定義的TypeEvaluator,自定義舉例:
如果想根據某個屬性TYPE來實現動畫,但是這個Type又不是Android系統內置的,這個時候就需要創建1個自己的evaluator來實現了,并且新創建的type必須實現接口TypeEvaluator。Android系統內置的type有int,float和color,他們對應的evaluator是IntEvaluator、FloatEvaluator和ArgbEvaluator。接口TypeEvaluator內只有1個方法,用來計算要實現動畫屬性的值。
- /**
- * Interface for use with the {@link ValueAnimator#setEvaluator(TypeEvaluator)} function. Evaluators
- * allow developers to create animations on arbitrary property types, by allowing them to supply
- * custom evaluators for types that are not automatically understood and used by the animation
- * system.
- *
- * @see ValueAnimator#setEvaluator(TypeEvaluator)
- */
- public interface TypeEvaluator<T> {
- /**
- * This function returns the result of linearly interpolating the start and end values, with
- * <code>fraction</code> representing the proportion between the start and end values. The
- * calculation is a simple parametric calculation: <code>result = x0 + t * (x1 - x0)</code>,
- * where <code>x0</code> is <code>startValue</code>, <code>x1</code> is <code>endValue</code>,
- * and <code>t</code> is <code>fraction</code>.
- *
- * @param fraction The fraction from the starting to the ending values
- * @param startValue The start value.
- * @param endValue The end value.
- * @return A linear interpolation between the start and end values, given the
- * <code>fraction</code> parameter.
- */
- public T evaluate(float fraction, T startValue, T endValue);
- }
先看看Android系統內置FloatEvaluator是怎樣弄的:
- public class FloatEvaluator implements TypeEvaluator<Number> {
- /**
- * This function returns the result of linearly interpolating the start and end values, with
- * <code>fraction</code> representing the proportion between the start and end values. The
- * calculation is a simple parametric calculation: <code>result = x0 + t * (v1 - v0)</code>,
- * where <code>x0</code> is <code>startValue</code>, <code>x1</code> is <code>endValue</code>,
- * and <code>t</code> is <code>fraction</code>.
- *
- * @param fraction The fraction from the starting to the ending values
- * @param startValue The start value; should be of type <code>float</code> or
- * <code>Float</code>
- * @param endValue The end value; should be of type <code>float</code> or <code>Float</code>
- * @return A linear interpolation between the start and end values, given the
- * <code>fraction</code> parameter.
- */
- public Float evaluate(float fraction, Number startValue, Number endValue) {
- float startFloat = startValue.floatValue();
- return startFloat + fraction * (endValue.floatValue() - startFloat);
- }
- }
還是舉個例子來測試1下,先看下面圖中的效果:


這個動畫在Android-Property Animation(屬性動畫)中就實現過了,當時是這么實現的:
- private void startValueAnimation(){
- if(mValueAnimator == null){
- mValueAnimator = ValueAnimator.ofFloat(0, 500);
- }
- mValueAnimator.setInterpolator(new AnticipateInterpolator());
- mValueAnimator.setTarget(mImageView);
- mValueAnimator.setDuration(3000);
- mValueAnimator.setRepeatCount(1);
- mValueAnimator.start();
- mValueAnimator.addUpdateListener(new AnimatorUpdateListener() {
- @Override
- public void onAnimationUpdate(ValueAnimator animation) {
- //同時設置X,Y 兩個屬性
- mImageView.setTranslationX((Float) animation.getAnimatedValue());
- mImageView.setTranslationY((Float) animation.getAnimatedValue());
- }
- });
- }
在動畫update的時候同時更新View的X和Y屬性。另外,使用AnimatorSet也能夠實現這類動畫效果。除這兩種以外還有無呢?就是自定義1個TypeEvaluator,主要代碼以下:
- private void startObjectAnimation() {
- ViewXYHolder viewXYHolder = new ViewXYHolder(mImageView);
- XYHolder startXY = new XYHolder(0f, 0f);
- XYHolder endXY = new XYHolder(500f, 500f);
- ObjectAnimator objectAnimator = ObjectAnimator.ofObject(viewXYHolder, "xY", new XYmEvaluator(), startXY, endXY);
- objectAnimator.setInterpolator(new LinearInterpolator());
- objectAnimator.setDuration(3000);
- objectAnimator.start();
- }
- public class XYmEvaluator implements TypeEvaluator {
- public Object evaluate(float fraction, Object startValue, Object endValue) {
- XYHolder startXY = (XYHolder) startValue;
- XYHolder endXY = (XYHolder) endValue;
- return new XYHolder(startXY.getX() + fraction * (endXY.getX() - startXY.getX()),
- startXY.getY() + fraction * (endXY.getY() - startXY.getY()));
- }
- }
- public class XYHolder{
- private float mX;
- private float mY;
- public XYHolder(float x, float y) {
- mX = x;
- mY = y;
- }
- public float getX() {
- return mX;
- }
- public void setX(float x) {
- mX = x;
- }
- public float getY() {
- return mY;
- }
- public void setY(float y) {
- mY = y;
- }
- }
- public class ViewXYHolder{
- private View imageView;
- public ViewXYHolder(View view){
- imageView = view;
- }
- //看到這個是否是感覺跟第1種方法1樣的感腳,只是封裝的不同
- public void setXY(XYHolder xyHolder) {
- imageView.setX(xyHolder.getX());
- imageView.setY(xyHolder.getY());
- }
- public XYHolder getXY() {
- return new XYHolder(imageView.getX(), imageView.getY());
- }
- }
而其實,對這個例子,使用的對象是1個View,Android系統中有封裝View屬性動畫的1個類:ViewPropertyAnimator,其簡單使用方式以下:
- private void startViewPropertyAnimation(){
- ViewPropertyAnimator viewPropertyAnimator;
- viewPropertyAnimator = mImageView.animate().x(500).y(500);
- viewPropertyAnimator.setDuration(3000);
- viewPropertyAnimator.start();
- }
一樣也能實現上面的動畫效果,只是只局限于View,不管方法怎樣變,但是終究原理都是1樣的,都是要同時改變X 和 Y兩個屬性的值。復雜1點的例子還是直接參考ApiDemo比較好,ApiDemo里面有個Custom Evaluator,值得學習! 最后引文作者提到了ViewPropertyAnimator類,這個類源碼解釋的意思大概是:這個類可以自動并優化view對象所觸及的某些屬性的動畫,與用單純的Animator控制view屬性動畫不同的是: Animator更合適于只對view對象的1兩個屬性進行操作,當view的很多個屬性都需要動畫操作時用ViewPropertyAnimator比較好,緣由在于后者可以將多個屬性操作放在1次invalidate履行,即多個屬性的變化可以是調用1次刷新。 而單純Animator每個屬性的變化都要單獨調用1次invalidate進行刷新。

上一篇 vps代理服務上網
下一篇 使用純CSS3實現轉動時鐘案例
程序員人生,我編程,我富裕,記住wfuyu網,php教程,php學習,php手冊,CMS模版制作
聲明:本站大部分內容是作者原創,少部分收集于互聯網供大家一起學習,原版權很多不明,如有侵權請聯系本站,謝謝!
粵ICP備14040726號-1?? 2015-2020 程序員人生 版權所有


